Cognito + Google federation – Improve the login experience for your users - AWS CDK
A common use case for Cognito User Pool integrated apps is to have the possibility to login not just with credentials, generated by the User Pool itself, but also with credentials from third party (federated) Identity Providers (idP) – like Google or Facebook.
In this quick tutorial, we’ll be reviewing how you can integrate a Cognito User Pool with Google as a federated Identity Provider, so your app users can login to your app using both their Cognito credentials and their Google account, reducing surface friction to acquiring new users to your app.
Creating the Cognito User Pool
Everything starts with the creation of the User Pool itself, which is pretty standard:
One thing that is slightly tedious about the process is that you need to think of a unique “prefix” for your Cognito User Pool’s hosted UI (which we’ll create in a second). Think of it like S3 bucket names. It needs to be globally unique across all AWS accounts and developers that use Cognito in their apps, so be creative here. I’ll use “acme-company-2022” for this example since it sounds unique enough:
Enable Hosted UI for the User Pool
Let’s continue by creating the Hosted UI for our Cognito User Pool:
At this point, if you deploy your stack, you should get a User Pool created, as well as a Hosted UI for it, which is accessible at https://${uniquePrefix}.auth.${region}.amazoncognito.com.
Adding a domain to a User Pool will also automatically enable an oAuth2 authorization server, with a couple of useful REST API endpoints. For the scope of this tutorial, you shouldn’t care about the Hosted UI that much and use just the Rest API endpoints.
At this point, we are ready with the first part of the Cognito setup and we need to switch context for a while and create a Project inside the Google Cloud Console. This requires us to use a special Redirect URL, composed of information we’ve gathered so far.
This is the URL that we’ll configure as a Redirect URL inside the Google Cloud Console Project, which means that Google will redirect users back to this URL once they finish the authorization process on Google’s side, passing a unique Authorization Code as a query parameter. Your app can use that Authorization Code to call Google APIs and retrieve confidential information about the user like his Google email or first name or last name.
I’m not going into details on this part of the process, since Cognito does a pretty good job of abstracting it away, which means that it just works. 🙂
Set up the project inside the Google Cloud Console
Let’s start by creating a Project in the Google Cloud Console:
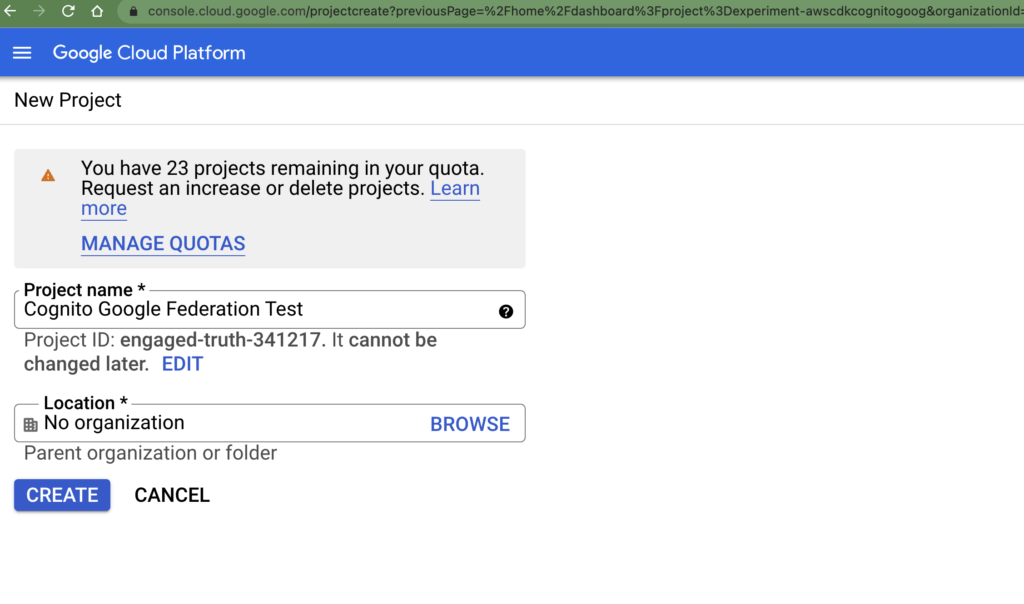
Wait for the project to be fully created (may take up to 30 seconds) and switch to it at the top-left dropdown. Then search for “APIs & Services” using the search at the top. Click on “oAuth consent screen” at the sidebar.
For User Type pick “External”:
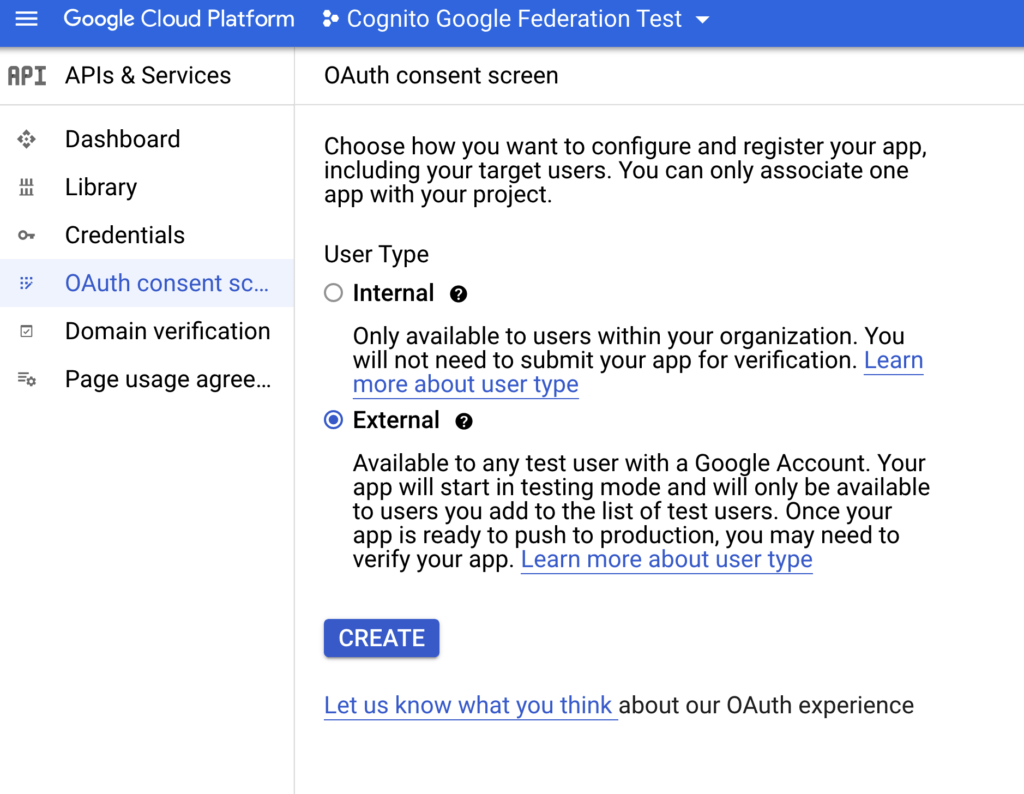
At the next step, continue filling the details about the consent screen with your personal data.
One important thing is that you need to add “amazoncognito.com” under “Authorized domains”. If you miss this step, things will not work.
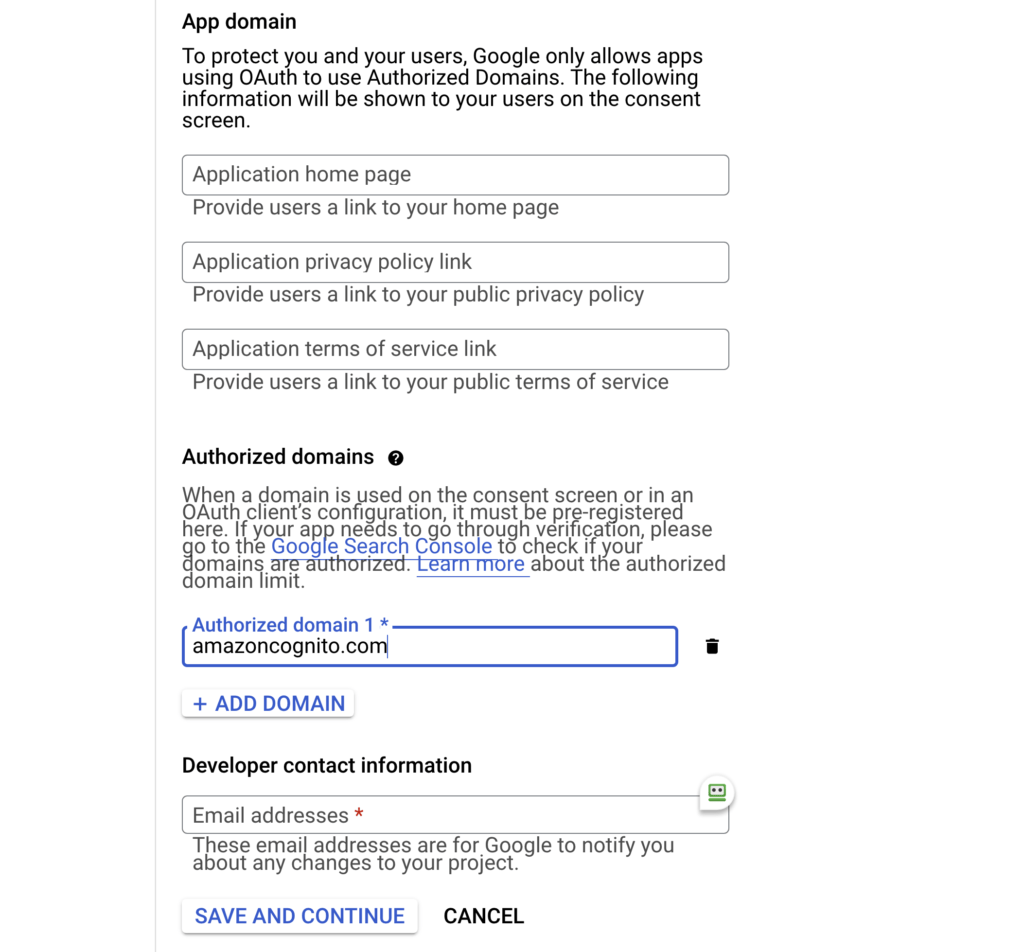
After you finish setting up the Consent Screen, navigate to “Credentials” at the sidebar.
Click “Create Credentials” -> oAuth Client ID -> Web Application.
For Authorized JavaScript Origins, use your Cognito Hosted UI’s URL: https://${uniquePrefix}.auth.${region}.amazoncognito.com
For Authorized redirect URIs, use this special Cognito Hosted UI URL: https://${uniquePrefix}.auth.${region}.amazoncognito.com/oauth2/idpresponse. This will make sure users will get redirected to Cognito after they login with Google, as mentioned earlier.
Once you finish this step, you should be able to extract the Google Client ID and Google Client Secret from this page. We’ll need those later.
Provide Google Client ID and Secret to CDK infrastructure
Now let’s continue setting up the rest of our AWS (CDK) infrastructure.
This will essentially allow our UserPool to communicate securely with Google when needed, using the Google-generated Client ID and Client Secret.
The above construct will create a Client within the User Pool, with Google support enabled.
One thing that we notice is the callbackUrl. This should be a dedicated URL in your Frontend App or an API Gateway backed URL that handles the final authentication step. Creating the Frontend App or the API Gateway to handle this is beyond the scope of this tutorial.
The thing you should know is: Cognito will ultimately redirect the end-user to this URL after the full authorization procedure finishes, attaching a Cognito a unique query parameter: ?code=[authorization_code]. It is the responsibility of your app to take this authorization code and exchange it for long-lived Cognito credentials (IdToken, AccessToken, RefreshToken) using code like this (NodeJS example):
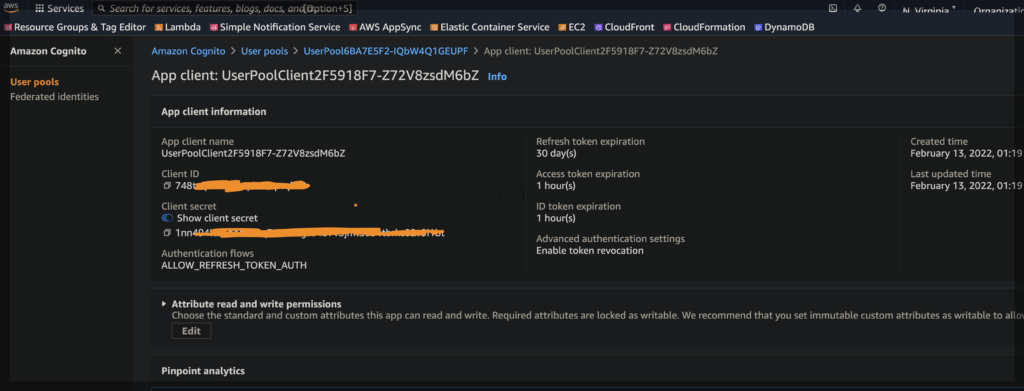
Pay attention to cognitoClientId and cognitoClientSecret. Those are not to be confused with the Google Client ID and Client Secret. These are instead, the secrets, generated by the UserPoolClient() construct above (retrievable through the AWS console):
Wrapping it up
The final step is creating a unique URL where you should send your users when they initiate a “Login with Google” operation from your app. I’ve personally used an API Gateway endpoint, backed by a Lambda for this. Here’s some pseudo code to demonstrate it (NodeJS example):
Remember that callbackUrl needs to be an URL in your app that can handle Cognito redirects (with a ?code=xxx query param attached) and be whitelisted in the UserPoolClient().
A complete example, including a dummy frontend and backend apps are available in this sample GitHub repo.